DIY Fresh Beat Band Rockstar Jacket, Simplicity 5284 Jacket D
If you have a preschooler, then you probably know what a BIG DEAL the Fresh Beat Band is. This year, both girls went to the concert, so we needed another Rockstar Jacket. Here is how we made ours:
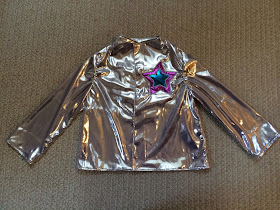
I made the Simplicity 5284 Jacket (D) per the instructions with just a few changes. I omitted the front pocket and sleeve applique, added top stitching around the neck/placket, swapped out buttons for Velcro (easier for my preschoolers) and added star appliques at breast and back.
The jacket is very simple and goes together quickly. This liquid lame fabric can be trying, as it can become bunched up (and stuck...) under the throat plate or cause the machine to skip stitches, most notably when top stitching the narrow hems. There may be a better way to solve this, but my solution is tear-away stabilizer. I just pin it along the bottom of the fabric, sew through all layers and tear away when the stitching is done. For very stubborn sections, I will apply the stabilizer to the top as well.
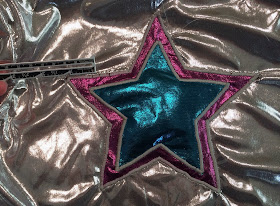
The star appliques were also made with liquid lame, with a stiff fusible interfacing applied to the back. (Note that this material states No Heat, but I had no issues ironing on the interfacing...) Once interfacing is applied, the inner star is attached to the larger one with a very short, wide overcast stitch. Make sure to leave enough space between your inner and outer stars, or you could end up with this:
 |
| The star on the right had too little allowance. Star on the left was the re-do. Plenty of room to attach to the jacket now. |
 |
| When overcasting, you might end up with some sparse patches. Just put that section back in the machine and overcast it again. You won't be able to tell where the new stitching starts and stops. |
 |
| Here's how it looks after touching up this section with another layer of overcasting. |
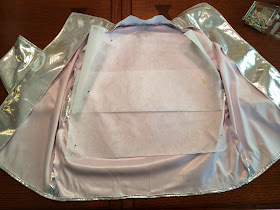
The stars are then applied to the jacket with the same overcast stitch. I do add tear away stabilizer to the inside of the jacket prior to stitching to avoid the aforementioned liquid lame headaches. Once the star is attached, the stabilizer is easily removed.
 |
| Pin in stabilizer |
 |
| Overcast on right side |
 |
| Tear away stabilizer |
 |
| View of wrong side once complete |
It would probably be easier to attach the applique before constructing the jacket (especially for the breast applique), but I am not that confident in my sewing and like to make sure the jacket fits correctly before going to the trouble of attaching the applique.


No comments:
Post a Comment